


This article explains a novel method to create an Android and iOS application while maintaining a single code base, using Google’s cross-platform open source initiative, Flutter. It provides a brief overview of how to install Flutter and initialise a new Flutter project in Android Studio IDE, which will fetch Covid-19 data from an open source API and display it in a simple UI.
Traditionally, Android developers are required to program their app using Kotlin or Java, while iOS developers need to learn Swift. Facebook bridged this gap in 2013, by introducing the React Native framework to develop a cross-platform application along with native platform capabilities, while Google introduced its Flutter framework for the same in 2017. These new tech upgrades help developers to build the applications for multiple platforms, while keeping account of native OS features. Flutter helps build beautiful user interfaces, seemingly with the help of Google’s open source Android Studio IDE. Flutter code is directly compiled to the native platform’s ARM machine code, giving it an edge over React Native, which works on top of the native platform’s components. This article starts with an introduction to Flutter and the steps needed to install it. It then explains the Flutter project in Android Studio IDE and offers details on API-nCov2019 v2.0.0. After that, it explains the development of the Coronavirus tracker mobile application.
About Flutter
Flutter is an open source software development kit (SDK) created by Google for developing apps on multiple platforms like Android, iOS and desktop, using only one code base. This framework is built on Dart, a relatively new programming language, which gives it an edge over other tech in terms of quality, speed of development and the app’s performance.
Everything in Flutter that can be seen on a screen, such as structural elements like a navigation bar or button, stylistic elements like size and colour, or even layout elements like margin or padding, is built with simple components called widgets. Google has prepared a prebuilt library of material and Cupertino widgets, which can be used with customisations to eliminate the redundancy of creating basic native components.
Anyone can develop a Flutter application easily using the Visual Studio Code editor. However, Android developers prefer Android Studio, because it provides the benefit of using an Android simulator for debugging purposes. Xcode in MacOS enables the power to debug apps on the iOS emulator. Another option is to run the app in real mobile phones by enabling developer options and connecting the mobile to your system, using a USB cable.
Installing Flutter
1. Check the system requirements from the Flutter installation document page at https://flutter.dev/docs/get-started/install. For developers using Mac, the specifications are as follows:
- OS: MacOS (64-bit)
- Disk space: 2.8GB
- Command line tools: bash, curl, git 2.x, mkdir, rm, unzip, etc.
2. Download the latest compressed stable Flutter bundle and extract the folder in the desired location on the local system. The current stable version for MacOS while writing this article is flutter_macos_1.22.4-stable.zip.
3. Update the path of the Flutter tool temporarily for the current session by using the terminal command, or permanently by editing the .bash_profile or .bashrc if using bash or .zshrc if using Z shell. The command to set the path is:
$ export PATH=”$PATH:[PATH_TO_YOUR_FLUTTER_DIRECTORY]/flutter/bin
4. If the path is updated permanently, remember to refresh the current window, or open a new terminal to incorporate the updated changes.
5. Run the command flutter doctor to check the setup dependencies.
Creating a Flutter project in Android Studio ID
This article provides steps to create a Flutter project in Android Studio, though developers can opt for Visual Studio Code Editor as well.
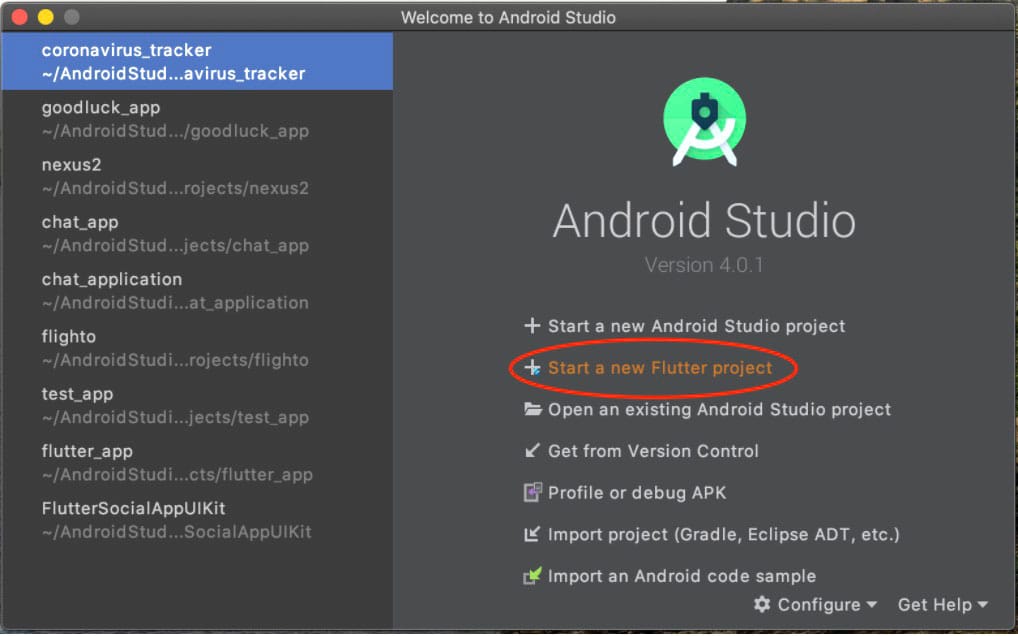
1. Initialise Android Studio and click on ‘Start a new Flutter Project’, as shown in Figure 1.
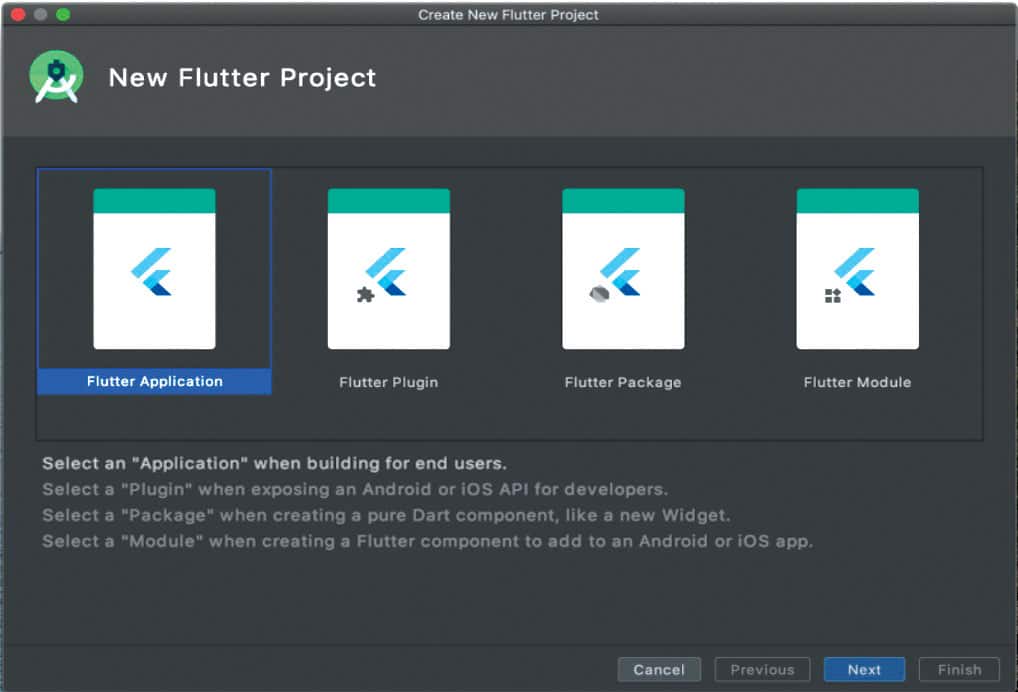
2. Select the ‘Flutter Application’ option as shown in Figure 2 to develop a mobile/Web app and click on ‘Next’. Developers can also choose to develop a plugin, package or a module for the framework. Packages like http, url_launcher, FlutterFire can be installed from https://pub.dev/ to reduce the effort in making components from scratch, while modules can also be developed to integrate the existing native Android, iOS or Web app with Flutter.
3. Enter your ‘Project Name’, add the Flutter SDK path (if not configured while installing the Flutter SDK), select your project location path, and add an app description (optional). Click on the ‘Next’ button to continue, which is shown in Figure 3.
4. Update the ‘Package Name’ as shown in Figure 4, if needed, or let it be the default name. This package name will work as ApplicationId, which is used to identify the app uniquely on the device and on the app stores. Developers can also select or deselect the Android and iOS support in the project on this page.
5. Click on ‘Finish’ to initialise the project.
API-nCov2019 v2.0.0
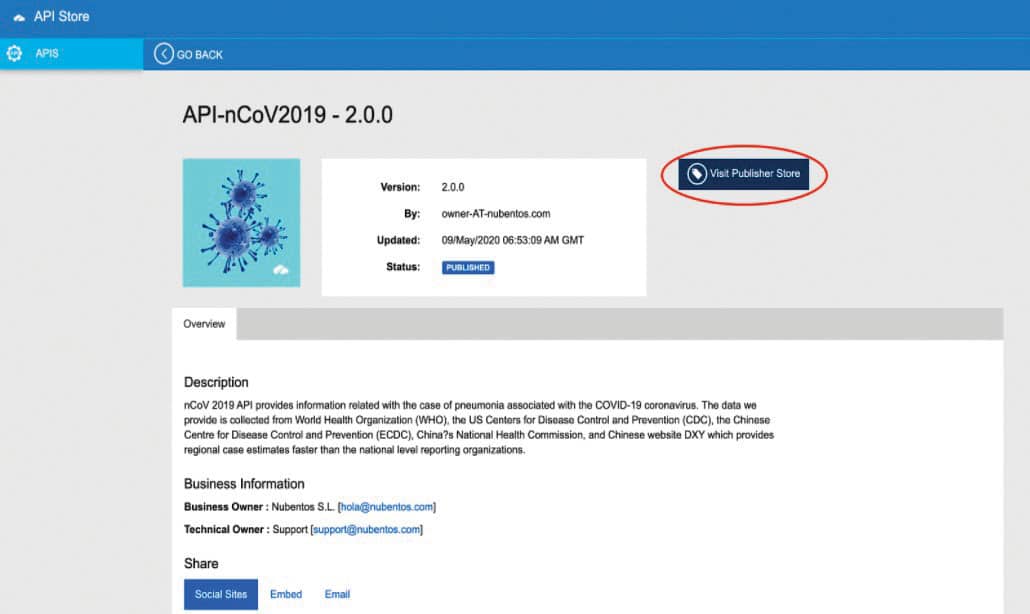
The coronavirus_tracker app uses free of cost API-nCov2019 v2.0.0 to get the Covid-19 data, which is shown in Figure 5. This API is provided by Nubentos S.L, an API marketplace for the digital healthcare sector. To use its services, visit the API Store and select API-nCov2019-2.0.0 [https://store.nubentos.com/store/apis/info?name=API-nCoV2019&version=2.0.0&provider=admin]. Register and log in to use the services.
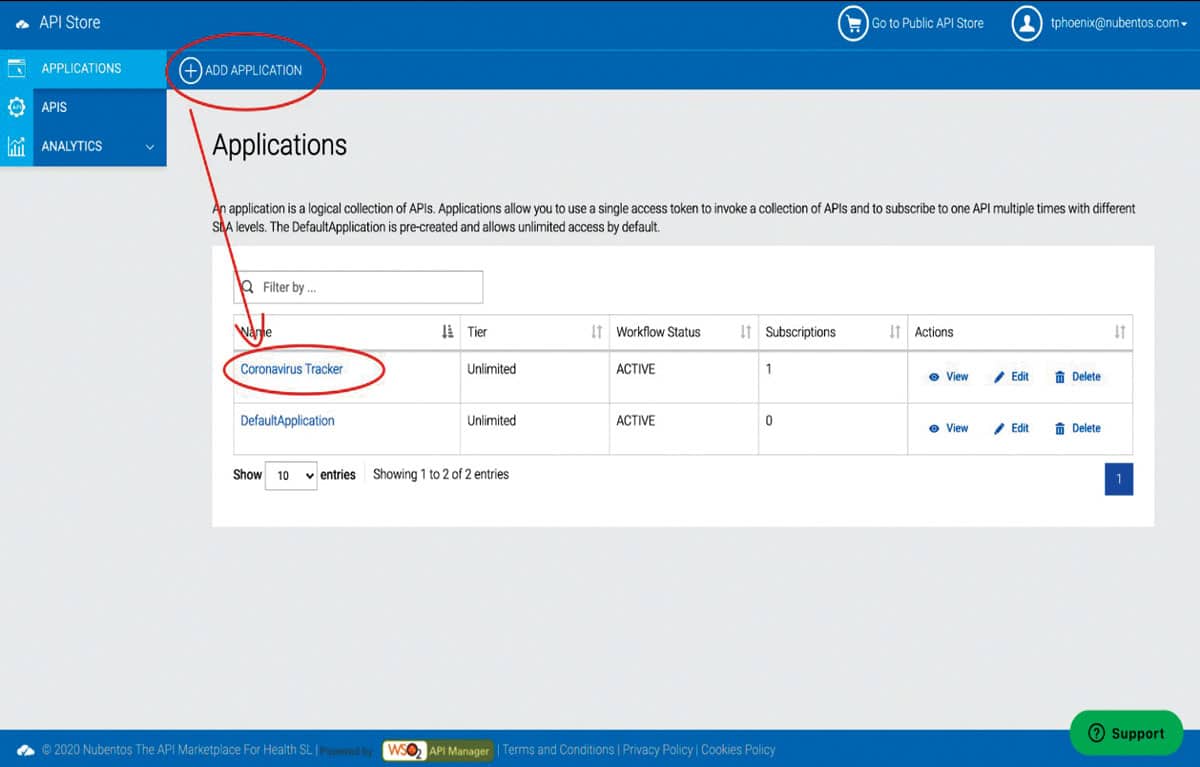
1. Go to the Application tab under the Main Menu and create a new application, or use a previous one to test the API, as shown in Figure 6.
2. In the Main Menu, go to the API section and then to the API console under the sub-menu.
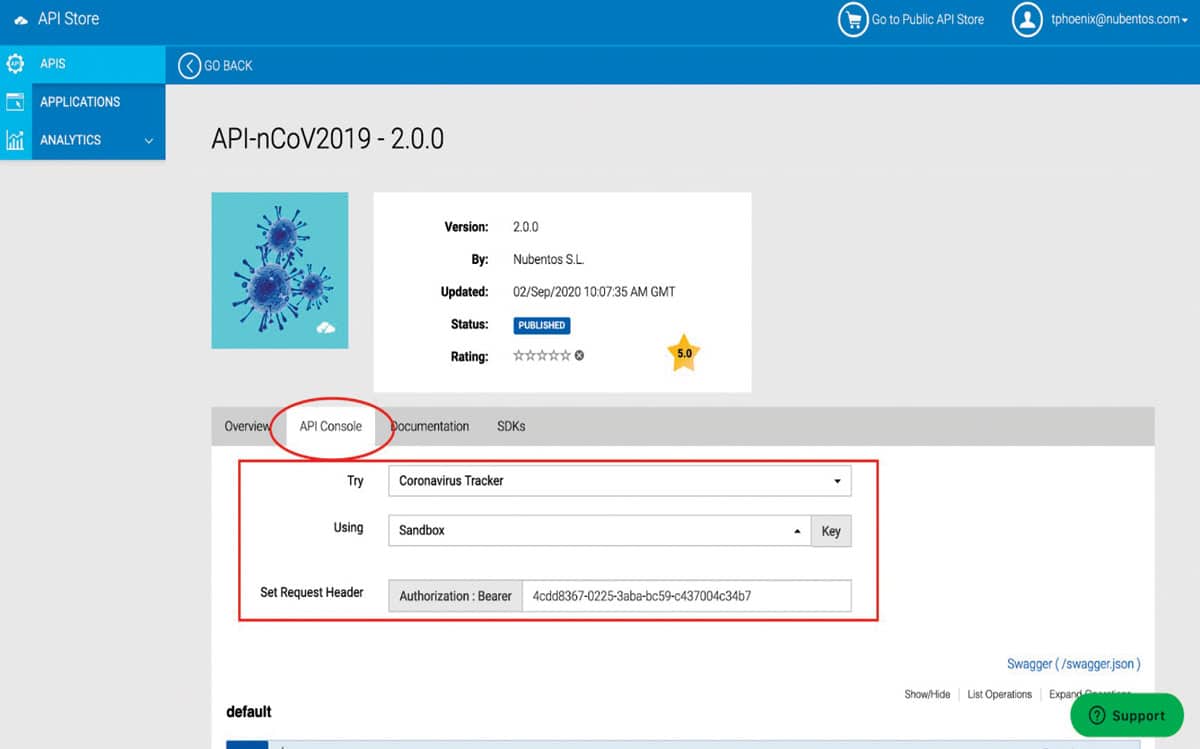
Select the application built in the first step (coronavirus tracker in this case). Use the sandbox option while testing, which is shown in Figure 7.
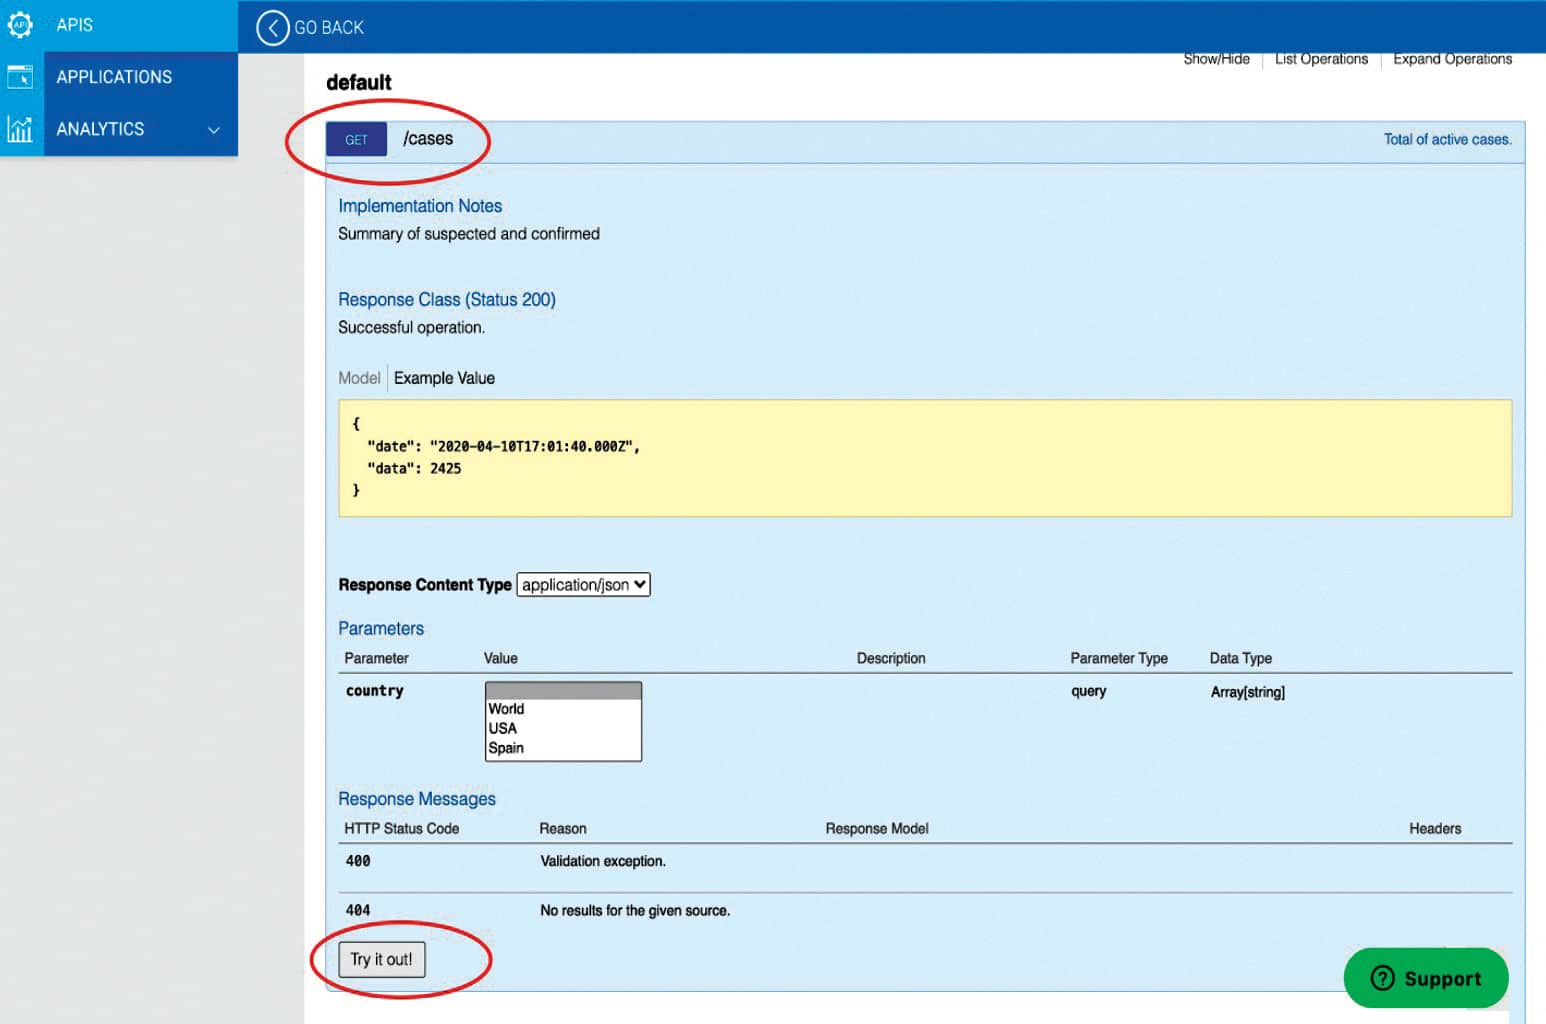
3. Check the endpoint descriptions and select which one to use according to the app needs (Figure 8). Try it out to get further insight, as depicted in Figure 9.
When two systems interact, the API provides a solution/protocol to communicate between them. Endpoint simply is one touch point end of that communication channel, and is a URL pointing to a resource on the server.

API-nCov19-v2.0.0 exposes 11 endpoints for use. These are:
- GET/ cases
- GET/ todayCases
- GET/ active
- GET/ deaths
- GET/ todayDeaths
- GET/ recovered
- GET/ critical
- GET/ casesPerOneMillion
- GET/ deathsPerOneMilion
- GET/ totalTests
- GET/ testsPerOneMIllion
Each endpoint supports Covid-19 data of numerous countries, along with total world Covid-19 data. The Coronavirus tracker app lists a number of countries, providing an easy UI to users and reducing the effort in typing country names.
Developing the coronavirus_tracker mobile app
Project overview
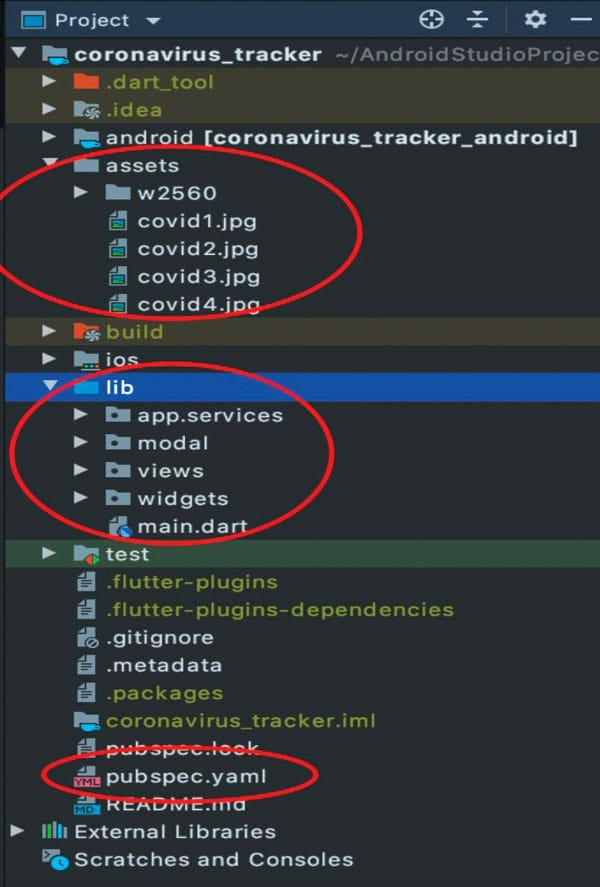
- Assets: This folder contains the images used in coronavirus_tracker. The sub-folder ‘w2560’ contains images of the national flags of various countries, which are used to make the UI more visually attractive.
- lib: This folder contains main.dart, which acts as the framework endpoint for the application. When the app is compiled, it finds the main() function on which the developer extends his/her app. Sub-folders are created to separate functions, modals, views and widgets.
- pubspec.yaml: This file needs to be updated according to the app dependencies. To connect the API, this app uses the http library, which is updated under the dependencies section. Images added in Assets are also updated under the flutter: assets: section.
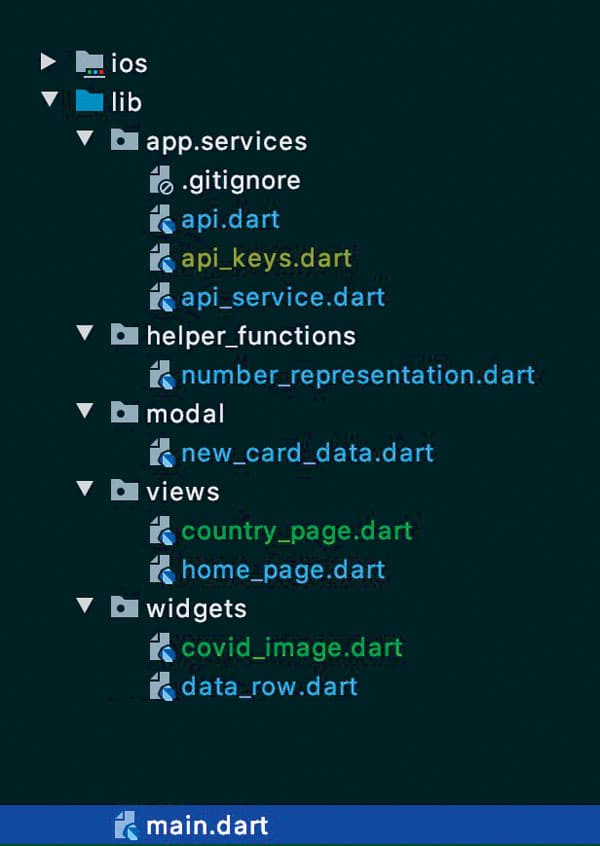
Figure 10 shows the project overview and Figure 11 shows the tree structure of the Flutter Code files.
Flutter code overview
● app.services:
○ api.dart: This file contains an API class, where host, port and basePath are declared, along with methods to construct the uniform resource identifier (URI) address. These URI addresses are used in api_services methods to fetch the corresponding data.
- Uri tokenURI(): This builds the URI address to get an accessToken. Here the query-Parameter is {‘grant_type’: ‘client_credentials’}.
- Uri endpointURI(): The URI address for endpoint is composed here.
- Uri endpointURIforQuery(): The URI address for endpoint along with que-ryParameter{country} is composed here.
○ api_services.dart: This file contains the APIService class, which contains methods for the following.
- Future<String> getAccessToken(): Fetches the access token that is necessary for further data queries.
- Future<int> getEndPointData(): This method gets the endpoint data using accessToken and endpoint as a parameter.
- Future<int> getEndPointData ForQuery(): This method is an extension of the above method, by adding parameters to the endpoint, and gets the specific data by country and endpoint.
○ api_keys.dart: This contains APIKeys class, implementing only one parameter nCovSandboxKey, which is used in the API class.
○ gitignore: Ignores api_keys.dart, for security measures.
● helper_functions:
○ number_representation.dart: This file has a single function, which trims the integer data received from the API to the nearest thousand (K), million (M), or billion (B).
● modal:
○ new_card_data.dart: This file implements the ‘NewCardData’ data model class, which contains only the class constructor with the parameters image, title, cases, today, active, death.
● views:
○ home_page.dart: Contains the HomePage class inheriting stateful widget, which helps in changing the state of the UI when new data is received.
| Note: Flutter has an inbuilt setState() method, but developers can choose from a variety of options using libraries like Provider or Getx, for state management. Almost all the code for our HomePage UserInterface resides here in the widget build method. |
○ country_page.dart: This page is navigated to show more detailed data about a country.The app bar contains the title Country Name. The body contains the national flag and the data for Covid-19 fetched from the API using the above given endpoints. Data points include Cases, Today’s Cases, Active Cases, Deaths, Today’s Deaths, Recovered, Critical, Cases Per One Million and Deaths Per One Million.
● The project described using the above folders and files is structured as shown in Figure 12. There are two pages in the app, namely, ‘HomePage’ and ‘CountryDataPage’. These pages are built using default and custom widgets. The green boxes in Figure 12 are the components of the layout, under the body of HomePage. ListView country data provides a button which navigates to the CountryDataPage.
● Widgets:
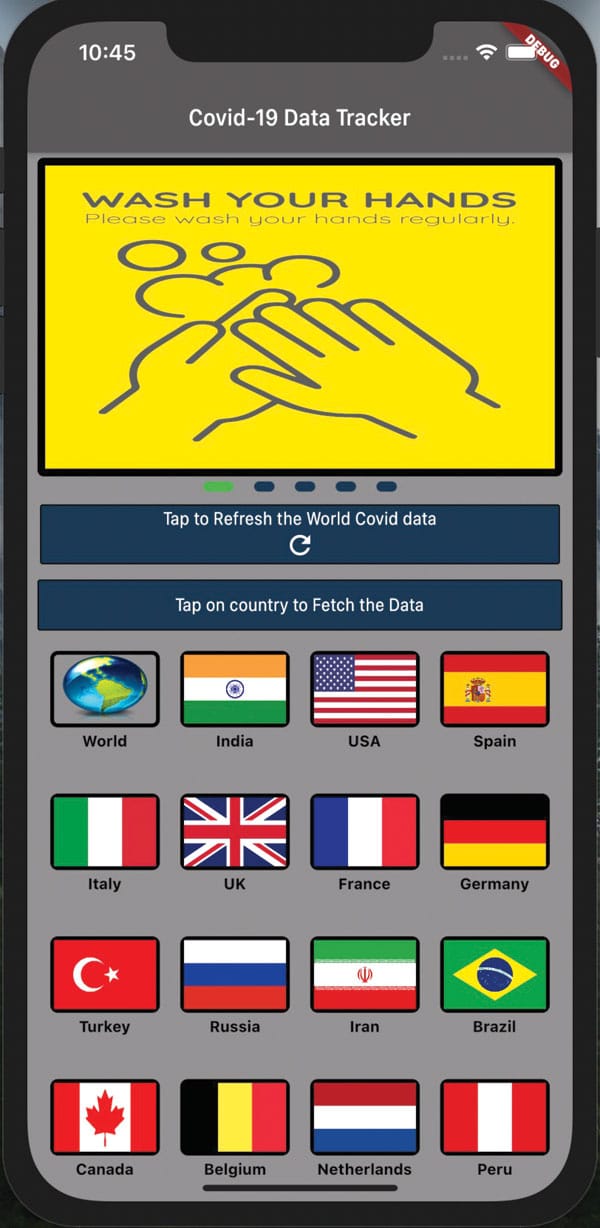
○ covid_image.dart: This file contains the stateful class (stfl) CovidImage, which provides a separate solution to put Covid precaution/safety images in the featured space. This widget uses AnimatedContainer along with ClampingScrollPhysics in PageView for a beautiful UI.
○ Data_row.dart: This file contains a customisable widget, which is used multiple times and is written here to reuse the code with the same configurations.
MyDataRow and CountryPageData Row classes provide a way to use title and data as a single widget, with desirable constant configurations like textColor, fontSize and FontWeight.
Screenshot of coronavirus_tracker on iPhone 12 Pro Max 14.2
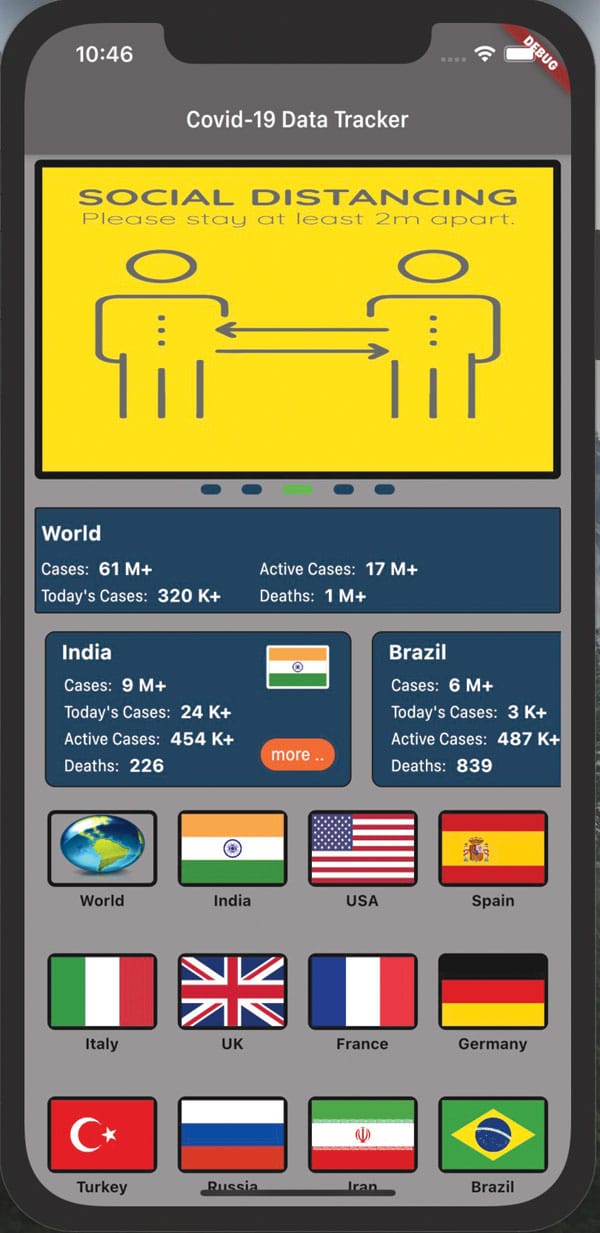
You can initialise the app with the HomePage screen, as shown in Figure 13. Users can scroll through the Covid precaution images from the featured section and can tap on the Refresh button to get the Covid-19 data of the world. They can also select a country from the grid list given, to get the Covid-19 data of that country.
Every country’s data card has a ‘more…’ button, which navigates to a country page of that card. For example, if a user taps ‘more …’ on India’s card (Figure 14), the app will navigate to a page containing more details about our country (Figure 15).

Developers can build the apk and distribute the .apk file directly for use. They can also update the necessary details like app icon, package name, etc, and publish the app on stores. As this is just the tip of the framework, you can visit Flutter.io [https://flutter.dev/ ] to check the documentation to get more information. The Flutter team has also been innovative in publishing short YouTube videos [https://www.youtube.com/channel/UCwXdFgeE9KYzlDdR7TG9cMw] on every widget. To explore Flutter libraries, visit https://pub.dev/. Developers can use dartpad to play with the Dart programming language on any current Web browser.
The source code for this project is available in our Git repository [Ref: https://github.com/t-phoenix/coronavirus_tracker].


