


The Google Cloud Platform (GCP) offers a managed Kubernetes service that makes it easy for users to run Kubernetes clusters in the cloud without having to set up, provision, or maintain the control plane. This article takes a quick look at running a Kubernetes cluster in GCP, using Google Kubernetes Engine, and then deploying a Node.js application on it.
in a production environment, when the user load increases or decreases, there is a need to scale up or scale down the resources. To facilitate a container’s resource management services, Google developed the Kubernetes container orchestration technology. The process of automatic deployment and management of running containers followed in Kubernetes is known as container orchestration. There are multiple container orchestration solutions available today including Docker Swarm, which is specific to Docker containers, and Mesos from Apache.
Docker Swarm is easy to set up but lacks some of the advanced auto scaling features. Mesos, on the other hand, is quite difficult to set up. Kubernetes is one of the top ranked choices for container orchestration and supports all cloud service providers including Amazon, Google and Microsoft Azure.
| Category | Command | Purpose |
| Basics | $ kubectl version | Check installed version of kubectl |
| $ kubectl get nodes | Get Kubernetes running nodes | |
| $ kubectl get nodes –output wide | Get nodes with IP listed | |
| $ kubectl get pods | Get the list of running pods | |
| $ kubectl get all | To see all created objects | |
| $ kubectl delete service application name | Delete the running application at Kubernetes | |
| $ gcloud container clusters delete hello-cluster | Delete the complete running cluster | |
| Deployment | $ kubectl create f deployment name.yml | Create specified name kubernetes yaml files |
| $ kubectl rollout history deployment DEPLOYMENT-NAME | View deployment/rollout history | |
| $ kubectl rollout status deployment Deployment-name | Check the status of the deployment of the Deployment-name |
Creating a Kubernetes cluster using the Google Kubernetes Engine (GKE)
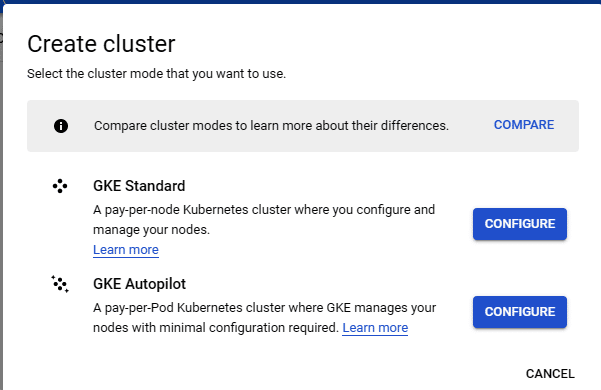
Let’s suppose you have created an account on Google Cloud Platform (GCP) and also activated the billing. To create a Kubernetes cluster, first click on Kubernetes Engine in the compute section and select the GKE standard mode shown in Figure 1.
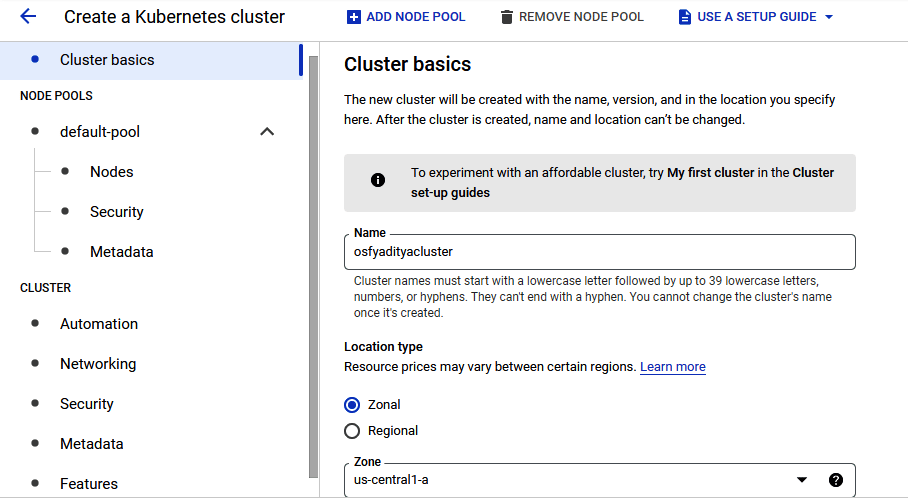
Now, enter the cluster name, its location, and specify the number of nodes and machine type. In this tutorial, the cluster has been created with the name ‘osfyadityacluster’, as depicted in Figure 2.
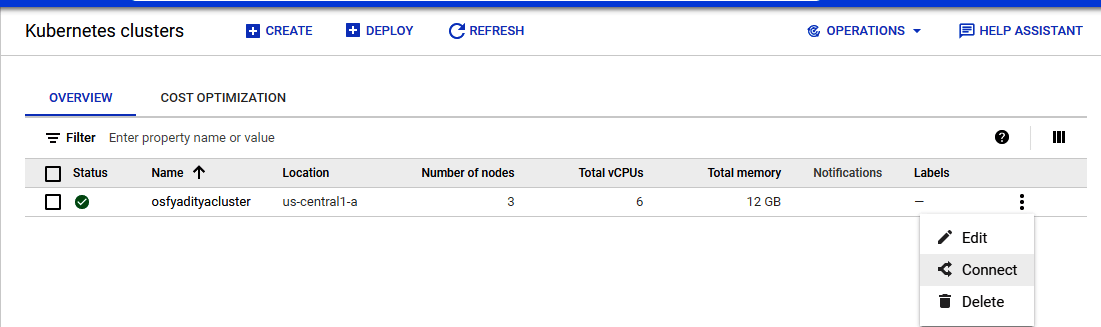
After some time, your Kubernetes cluster will be created with three node sizes, which is depicted in Figure 3.
Connecting to the Kubernetes cluster created at GKE
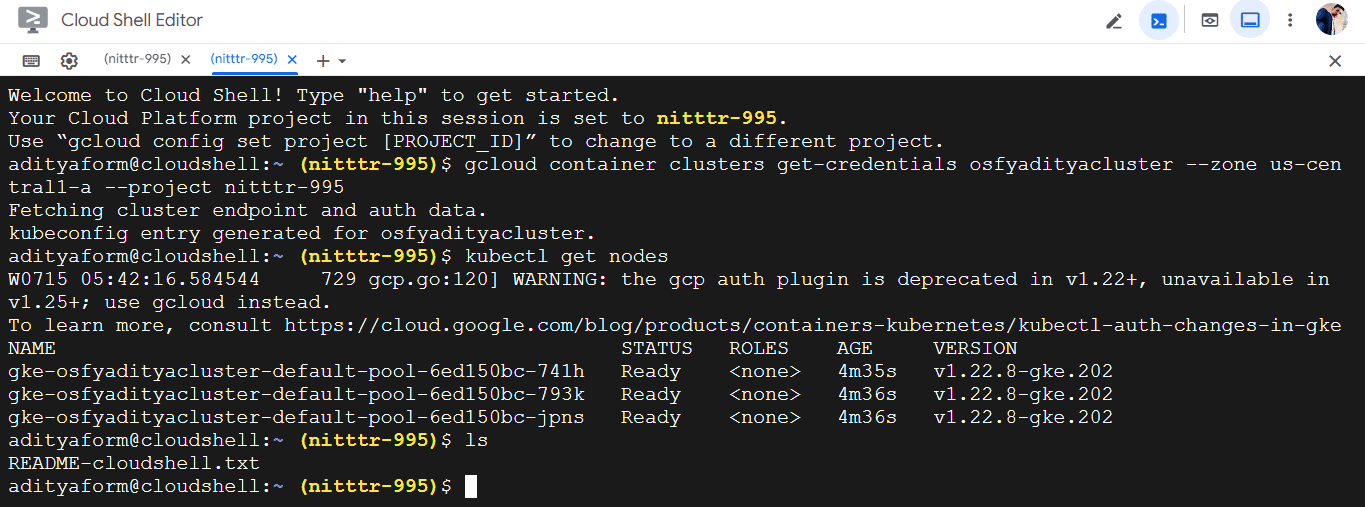
On your dashboard, select the newly established cluster. Click on Connect once you are on the information page for your cluster. You will be given a script that will set up your local computer’s kubectl configuration so that you can log in and connect to your GKE cluster. Run the following command to verify that you are connected properly:
$ kubectl get nodes
This command will also give the view on pods running in the kube-system name space, as shown in Figure 4.
Frequently used commands for developing Kubernetes solutions
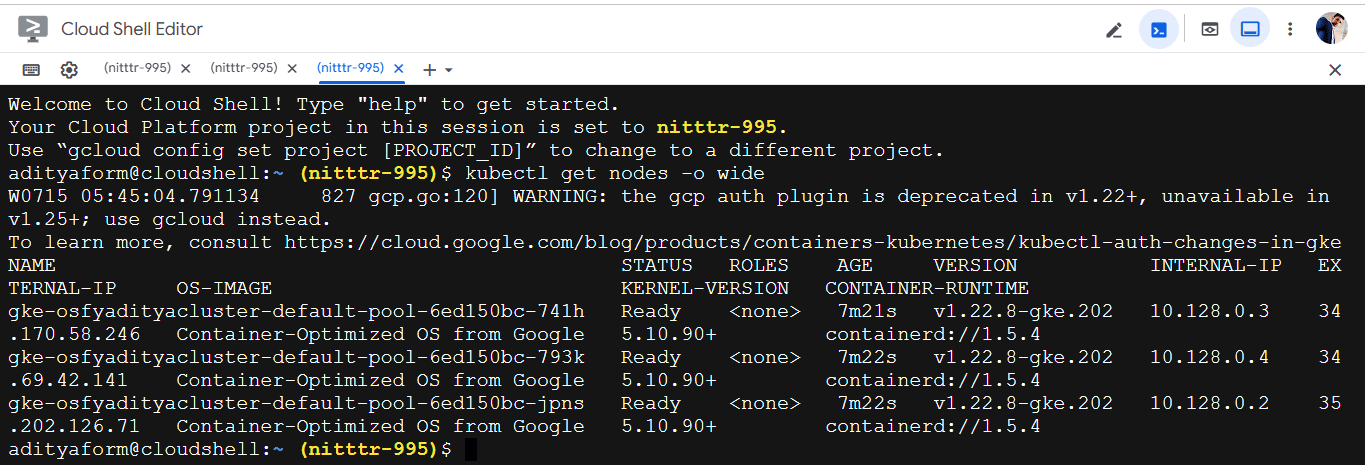
While developing a Kubernetes solution a user should have a good understanding about the commands to be used. Table 1 summarises the list of frequently used commands when implementing a Kubernetes cluster over the GCP. A sample screenshot of the output of $ kubectl get nodes –output wide command is shown in Figure 5.
Deploying a Node.js application on the Kubernetes cluster
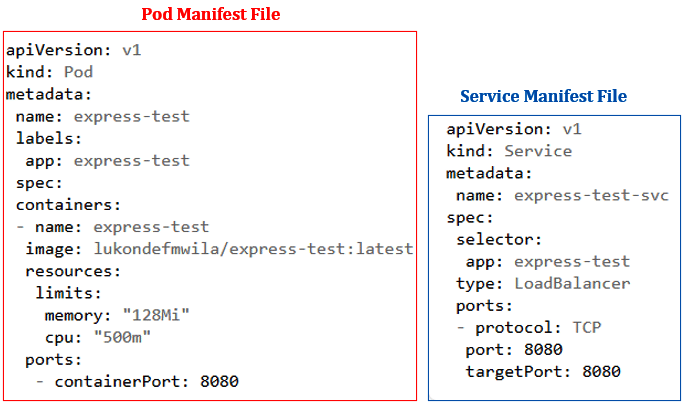
The Express framework serves as the foundation for the single route endpoint in the Node.js app. The Pod Manifest file will specify the public repository where the application is made available as a container image. Additionally, a service will be set up so that the application may be accessed by the general public via an outside load balancer. The Pod Manifest and Service Manifest files have been deployed in this tutorial. Figure 6 displays the setup of these distributed files.
After creating these manifest files, you need to create two different resources in the cluster. The following commands are used for this purpose:
$ kubectl create -f service.yaml
$ kubectl create -f pod.yaml
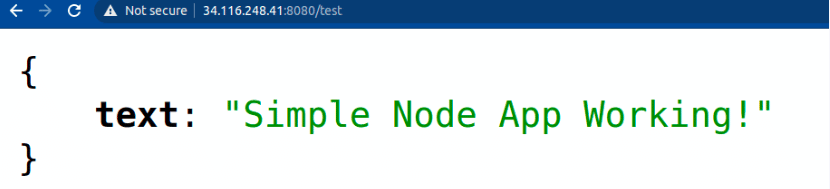
You can verify that the pod is running as expected by running the $ kubectl get pods command in your terminal. After confirming that the pod is running, open a new tab in the browser and access the /testroute on your application. The running Node.js application is shown in Figure 7.
Managed Kubernetes clusters like GKE enable businesses to reap the benefits of operating their workloads in a secure and appropriately designed Kubernetes environment, without the need for a team of Kubernetes experts. Platforms like GKE that handle the grunt work of Kubernetes management while providing the advantages of container orchestration make the benefits of cloud native development accessible.


