This brief tutorial explores the wireless netbooting of the LLM model Gemini AI in an Ubuntu server.
With the rapid advancement of artificial intelligence, large language models (LLMs) require specialised operating systems that optimise resource utilisation, ensure efficient model execution, and facilitate seamless deployment across various hardware architectures. An LLM OS is designed to meet these demands by providing a streamlined environment tailored for AI workloads, incorporating high-performance computing, distributed processing, and low-latency networking. Given the extensive computational and storage requirements of LLMs, netbooting presents a practical solution for deploying an LLM OS without relying on local storage. By leveraging network-based booting mechanisms such as PXE (Preboot Execution Environment), TFTP (Trivial File Transfer Protocol), and NFS (Network File System), an LLM OS can be centrally managed, rapidly provisioned, and dynamically updated. This approach not only reduces hardware dependencies but also ensures uniformity across multiple AI nodes, making it ideal for large-scale AI research, data centres, and enterprise deployments.
AI and LLM integration with netbooting
AI-based LLMs are enabling advanced natural language processing (NLP) capabilities that help organisations extract insights from massive datasets, automate content generation, and enhance customer support systems. Deploying an OS that directly boots into an interactive TTY-based LLM model can eliminate unnecessary overhead from traditional installations and significantly reduce boot times. By leveraging containerised environments such as Docker or Singularity, organisations can dynamically load AI models like Llama 2, GPT-based models, or BERT directly from network-attached storage without requiring individual local installations.
Furthermore, using a stateless boot model for LLM processing ensures that each session runs in a clean environment, preventing data persistence issues and improving security by mitigating malware risks. This approach is particularly useful in GPU-based AI clusters, where machines need to be reinitialised frequently for different workloads.
With its scalability, security, and efficiency, netbooting remains an excellent choice for organisations looking to optimise system management and integrate AI-driven technologies seamlessly into large-scale deployments. Whether for LLM-based interactive environments, AI inference clusters, or high-performance computing, netbooting continues to evolve as a foundational technology for next-generation IT infrastructure.
To facilitate such a working system there are both wired and wireless ways. While wired interfaces require just an Ethernet connection of the host and server, the wireless mechanism requires setting up a DHCP server or modification of the existing DHCP server of the network. Let us explore the wireless netbooting of the LLM model Gemini AI using the steps mentioned below.
First, we need to set up the server with a TFTP server and a DHCP server using the software called SERVA. After extracting the software, we can configure the DHCP server to assign an IP address to the host system using Serva64.exe for 64-bit systems, as shown in Figure 1.
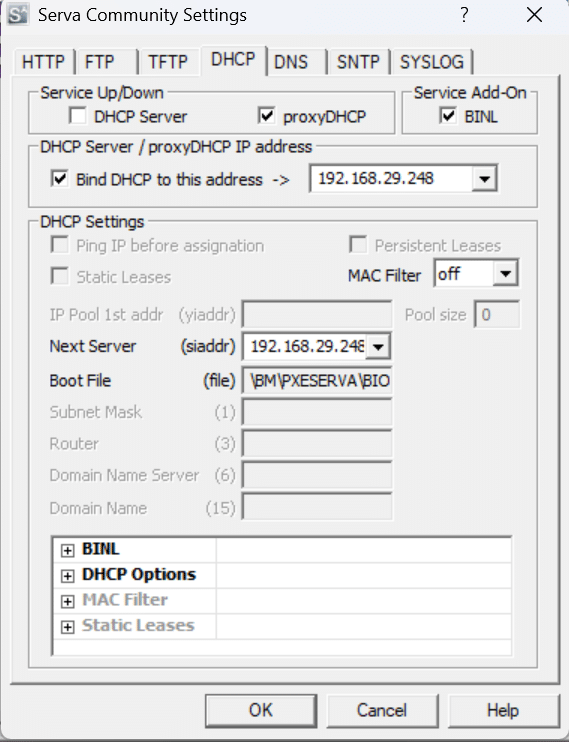
This setup can function as a DHCP server with a static IP assignment or, as in this case, as a proxy DHCP server to avoid interfering with the existing DHCP server on the LAN router. Additionally, the BINL protocol, used in Windows Deployment Services (WDS) for PXE booting, facilitates the retrieval of boot images and configurations.
Next, the TFTP server must be configured by specifying the directory where Serva64.exe is located, ensuring proper file transfer and deployment, as shown in Figure 2.
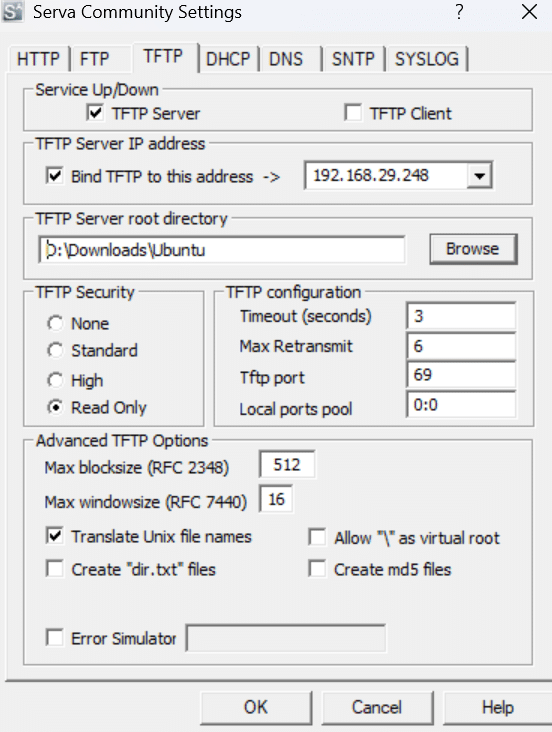
Ensure that the block size is adjusted according to the host system’s available storage capacity. After configuring both servers, restarting Serva64 will automatically generate the necessary configuration folders within the specified directory.
Next, extract the ISO and insert the files inside the NWA_PXE folder and include the ServaAsset.inf file alongside the ISO. In this instance, Ubuntu Live Server is being used.
To integrate an AI-based LLM onto the ISO, it is essential to understand the Ubuntu Server boot process. Initially, GRUB or another bootloader is loaded, which then loads the kernel (vmlinuz) and initrd (initial RAM disk). Subsequently, the vmlinuz and initrd files located inside the Casper folder are executed. This process eventually mounts the SquashFS, which contains the Ubuntu environment within the same directory.
To enable custom LLM functionality, a custom Bash script must be incorporated into the SquashFS. This step is crucial as system updates and essential packages must be preloaded into the OS for interacting with the Gemini API and utilising networking tools such as ping or curl.
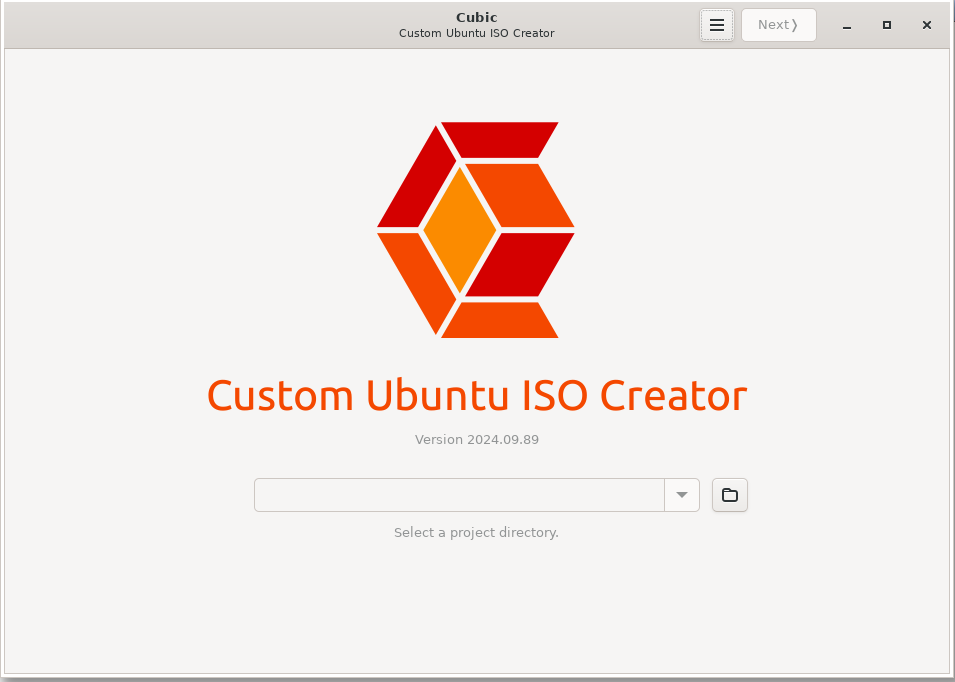
The SquashFS file is a compressed disk image that must be modified using the Cubic Ubuntu application. To install Cubic on a Linux-based OS or WSL, execute the following commands in the terminal:
sudo apt-add-repository universe
sudo apt-add-repository ppa:cubic-wizard/release
sudo apt update
sudo apt install --no-install-recommends cubic
Once the application is opened, select the directory containing the Ubuntu ISO for editing. After clicking ‘Next’, a virtual machine environment is created, allowing you to insert the boot file inside SquashFS.
Integrate the boot script to query the Gemini API using a code structure similar to the example given below.
query_gemini() {
read -p “prompt : “ prompt
#echo $prompt
local response=$(curl -s “https://generativelanguage.googleapis.com/v1beta/models/gemini-1.5-flash:>-H ‘Content-Type: application/json’ \

-X POST \

-d “{\”contents\”: [{\”parts\”:[{\”text\”: \”$prompt\”}]}]}”
)
echo “$response” | grep -oP ‘”text”:\s*”\K[^”]*’ | head -n1
}
Once the changes are saved using <i>Ctrl+X</i>, navigate to the root directory using the command <i>cd/</i> and edit the <i>rc.local</i> file to include the script in the system’s startup process. After making the necessary modifications, click <i>Next</i>, and the application will automatically generate a modified disk image for network booting.
Right-click on the NEW_PXE folder, open its properties, and enable network sharing for all users to ensure accessibility.
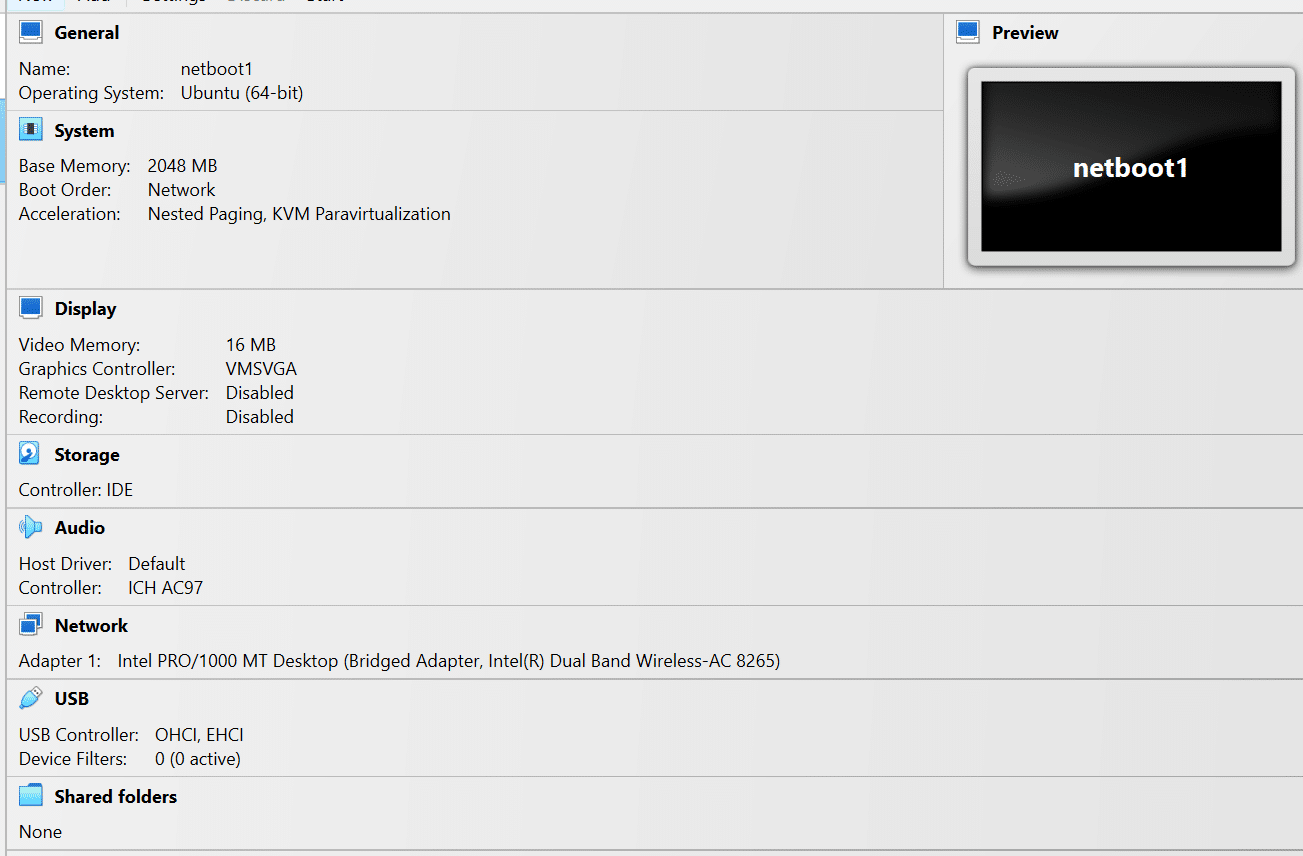
In VirtualBox, select the Netboot option to be top priority in boot order and set other settings as shown in Figure 4.
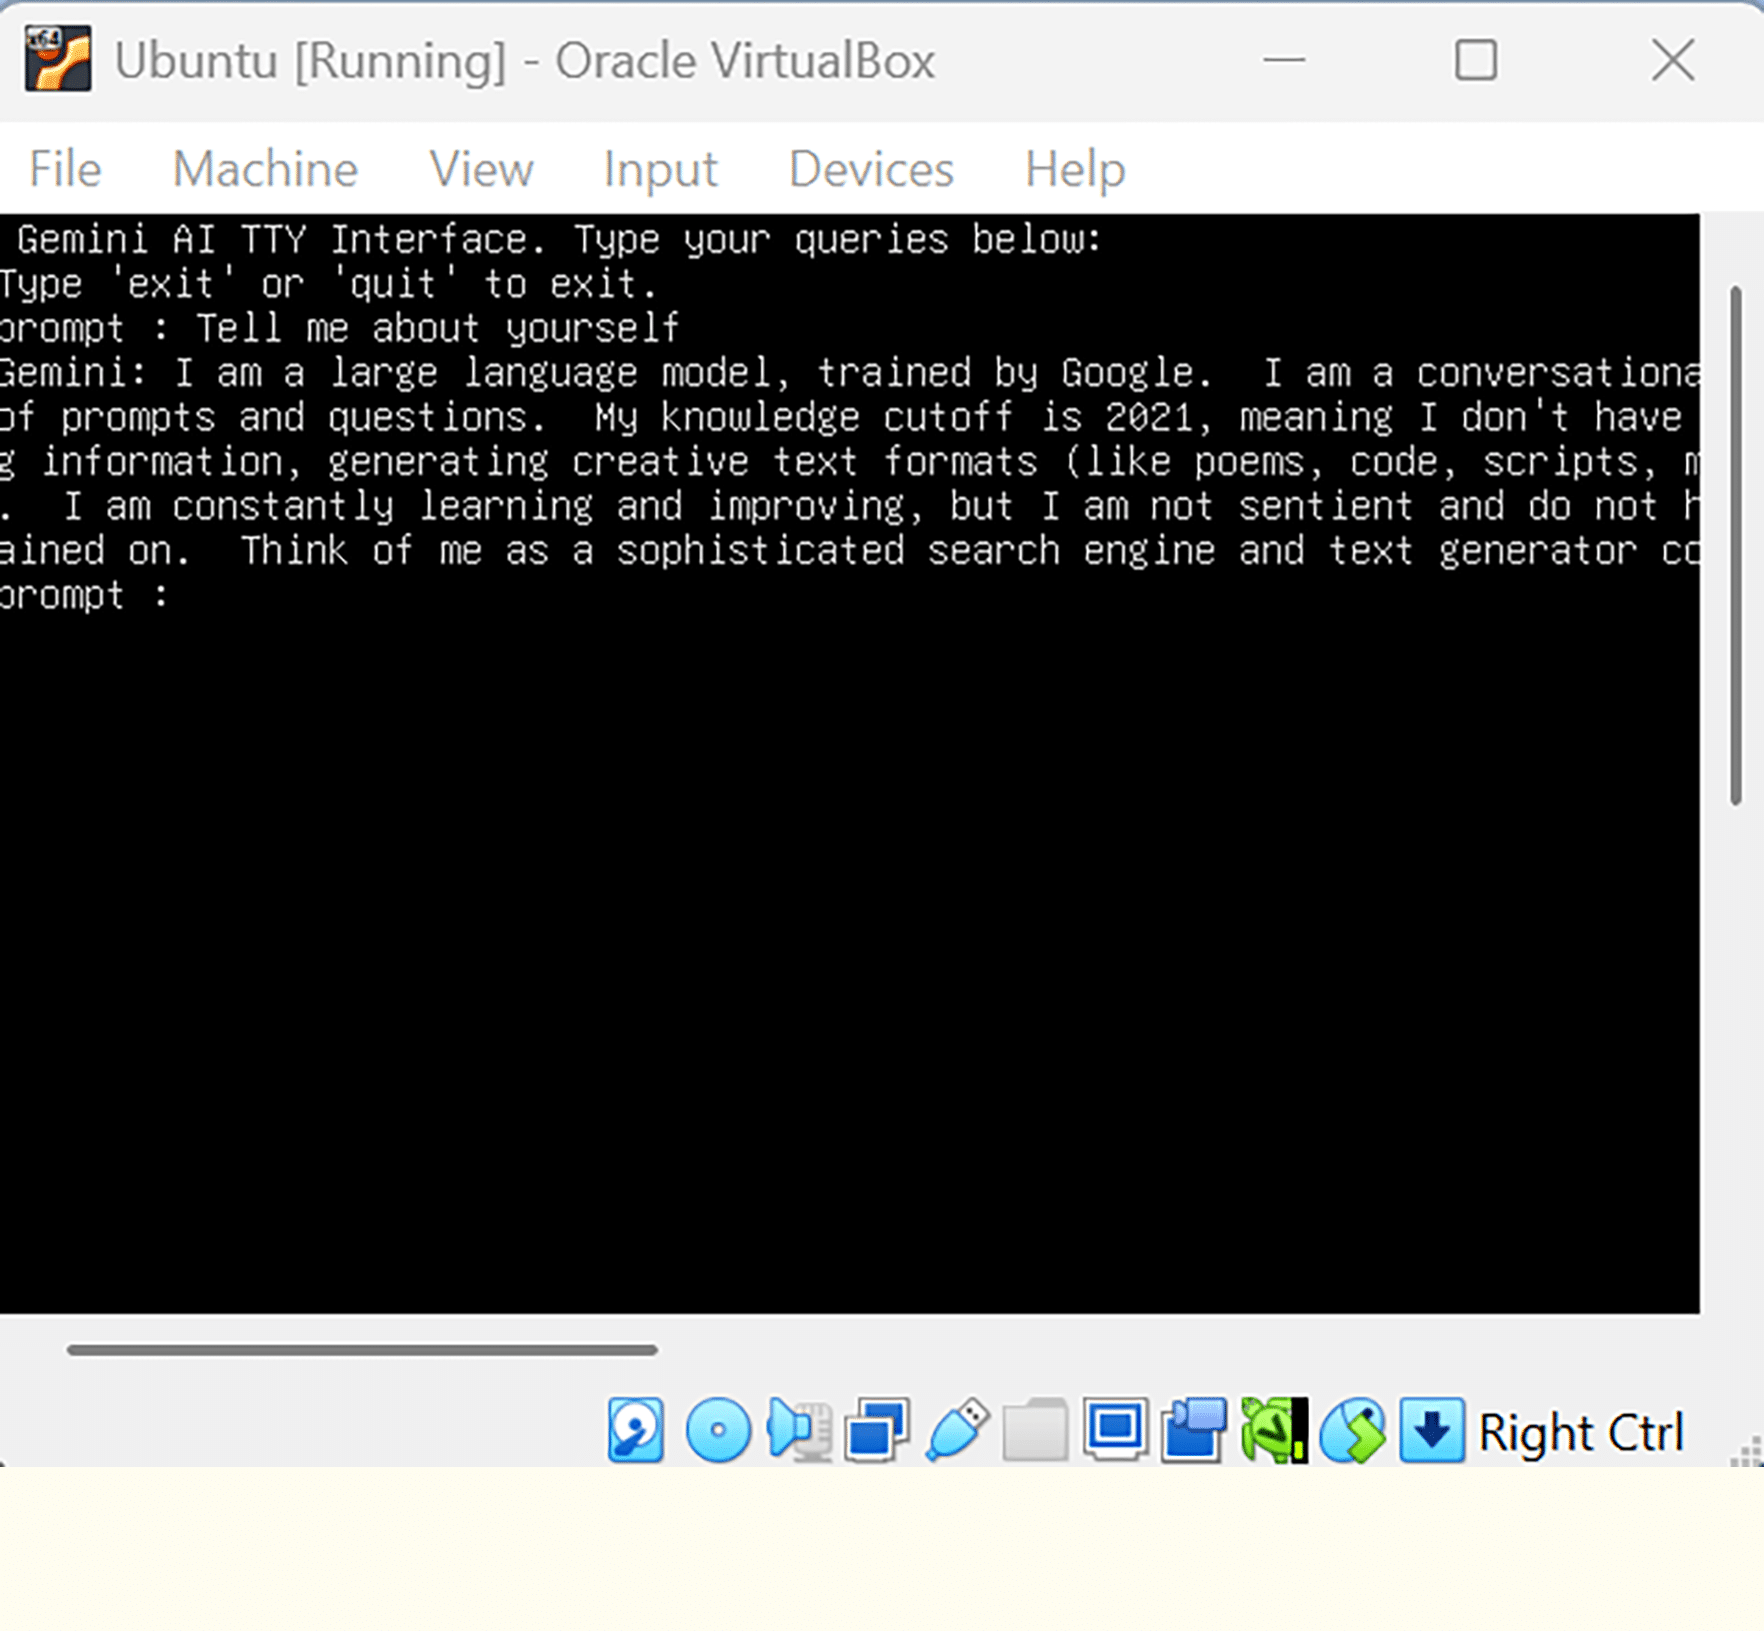
Soon after booting into the newly created custom OS, an interactive terminal is displayed, enabling seamless AI-based queries. This terminal serves as the interface for users to interact with the AI system, allowing for a wide range of applications. From querying the Gemini API to utilising various networking tools, the terminal facilitates dynamic and real-time communication with the system. The extensive functionality provided by this AI-powered terminal can be leveraged for tasks such as data analysis, automation, system monitoring, and other complex operations, all of which are integral to the success of the custom OS. As shown in Figure 5, the user is presented with a streamlined, efficient environment for executing advanced queries and commands, demonstrating the system’s full capabilities and the value of integrating AI into the boot process.