


Amazon Elastic Compute Cloud (Amazon EC2) is a Web service that provides secure, resizable compute capacity in the cloud. It is designed to make Web-scale cloud computing easier for developers. This article is a tutorial on connecting to Amazon EC2 from a Windows system.
Cloud computing is the on-demand delivery of IT resources over the Internet with a pay-as-you-go pricing. Instead of buying, owning and maintaining physical data centres and servers, you can access technology services, such as computing power, storage and databases, on an as-needed basis from a popular cloud provider like Amazon Web Services (AWS). This article takes a quick look at the steps needed to connect to Amazon cloud instances from a Microsoft Windows system.
System prerequisites
Before you connect to your Amazon EC2 Linux instance from the Windows system, you need to complete the following prerequisites.
Verify that the cloud instance is running: After you launch an instance, it can take a few minutes to be ready so that you can connect to it. Check if your instance has passed its status checks. You can view this information in the Status Checks column on the Instances page.

Install PuTTY on your local computer: Download and install the latest version of PuTTY from the PuTTY download page. Currently, the latest version of PuTTY is 0.74.
Converting a private key using PuTTYgen
PuTTY does not natively support the private key format for SSH keys.
It provides a tool named PuTTYgen, which converts keys to the required format for PuTTY. You must follow the steps given below to convert your private key (.pem file) into this format (.ppk file), in order to connect to your instance using PuTTY.

a) From the Start menu, choose All Programs>PuTTY>PuTTYgen.
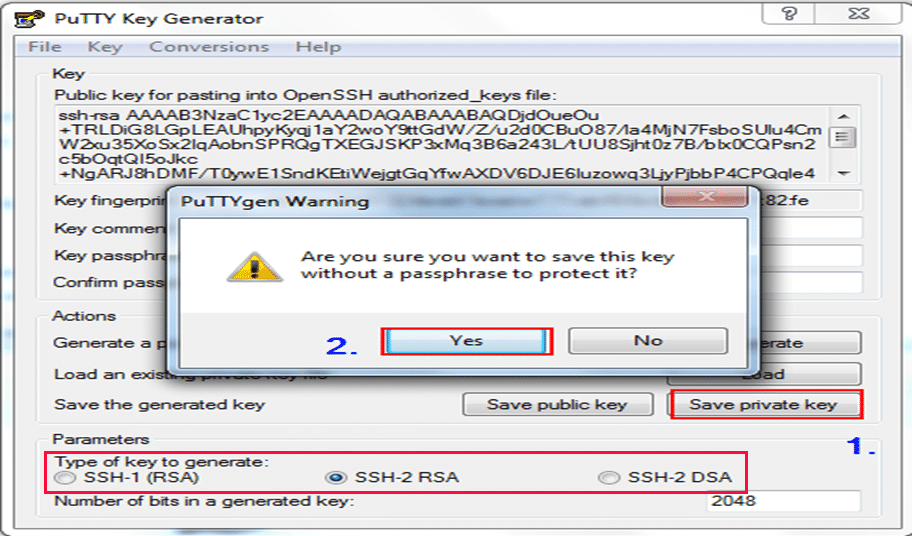
b) Under the type of key to generate, choose RSA. If you’re using an older version of PuTTYgen, choose SSH-2 RSA.
c) Load the .pem file. By default, PuTTYgen displays only files with the extension .ppk. To locate your .pem file, choose the option to display files of all types.
d) Select your .pem file for the key pair that you specified when you launched your instance, and choose Open. PuTTYgen displays a message that the .pem file has been successfully imported. Choose OK.
e) To save the key in the format that PuTTY can use, choose Save private key. PuTTYgen displays a warning about saving the key without a passphrase. Choose Yes.
f) Specify the same name for the key that you used for the key pair (in our case hadoopec2cluster.ppk) and choose Save. PuTTY automatically adds the .ppk file extension.
Connecting to Amazon EC2 Linux instance
Now from your Windows system, use the following procedure to connect to your Amazon EC2 Linux instance using PuTTY. You need the .ppk file that you created for your private key.
A. Start PuTTY (from the Start menu, choose All Programs>PuTTY).
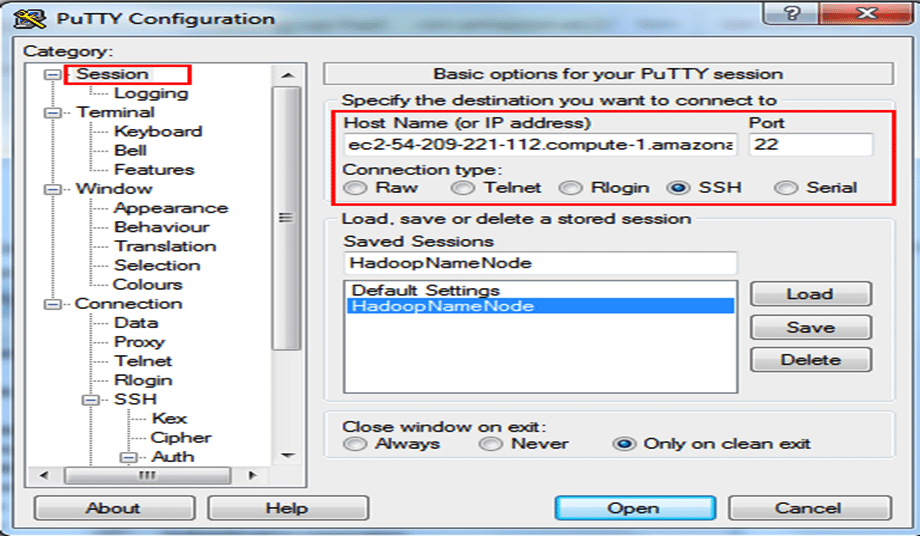
B. In the Category pane, choose a session and complete the following fields:
- In the Host Name box, write the public DNS name of your running instance.
- Ensure that the port value is 22.
- Under Connection type, select SSH.
C. In the Category menu, expand Connection, expand SSH, and then choose Auth. Complete the following:
- Choose Browse.
- Select the .ppk file that you generated for your key pair and choose Open.
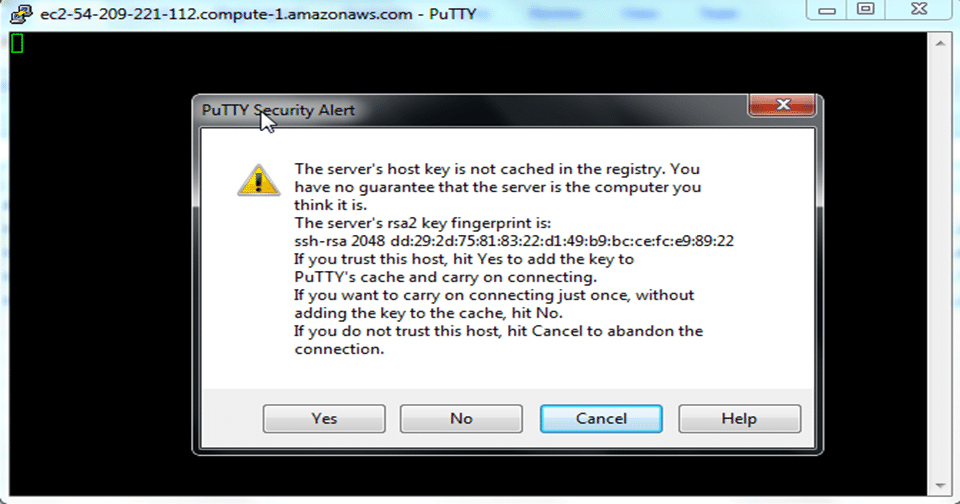
D. If this is the first time you have connected to this instance, PuTTY displays a security alert dialogue box that asks whether you trust the host to which you are connecting. Choose Yes. A window opens, and you are connected to your instance.
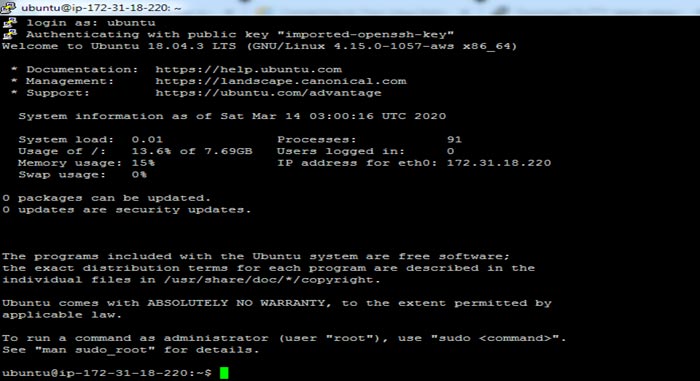
The Windows system is now connected to the Linux instance running on the Amazon EC2 cloud server.


